Wednesday, March 30, 2011

Turning 2 is AWESOME!

Since E is a huge Yo Gabba Gabba (YGG) fan, we decided to use that as a theme for his party this year. Unfortunately, YGG party supplies can't be purchased in party stores; you have to order the stuff online. That means is addition to the cost of the items, you also have to pay shipping. We decided this wouldn't do, so we took matters into our own hands.

Mommy made E a cute "Brobee 2" shirt to wear for your party. We picked up some table cloths and paper supplies in bright YGG colors. We also purchased some balloons in those same bright colors. Daddy, Meowmaw, and Mommy made some cute YGG character decs to add a special touch. The sunroom looked so cute, and E loved it!


We topped it all off with some adorable homemade cupcakes that looled like the YGG gang. Mommy used royal icing to create the features and homemade buttercream icing for the base colors. They were yummy!


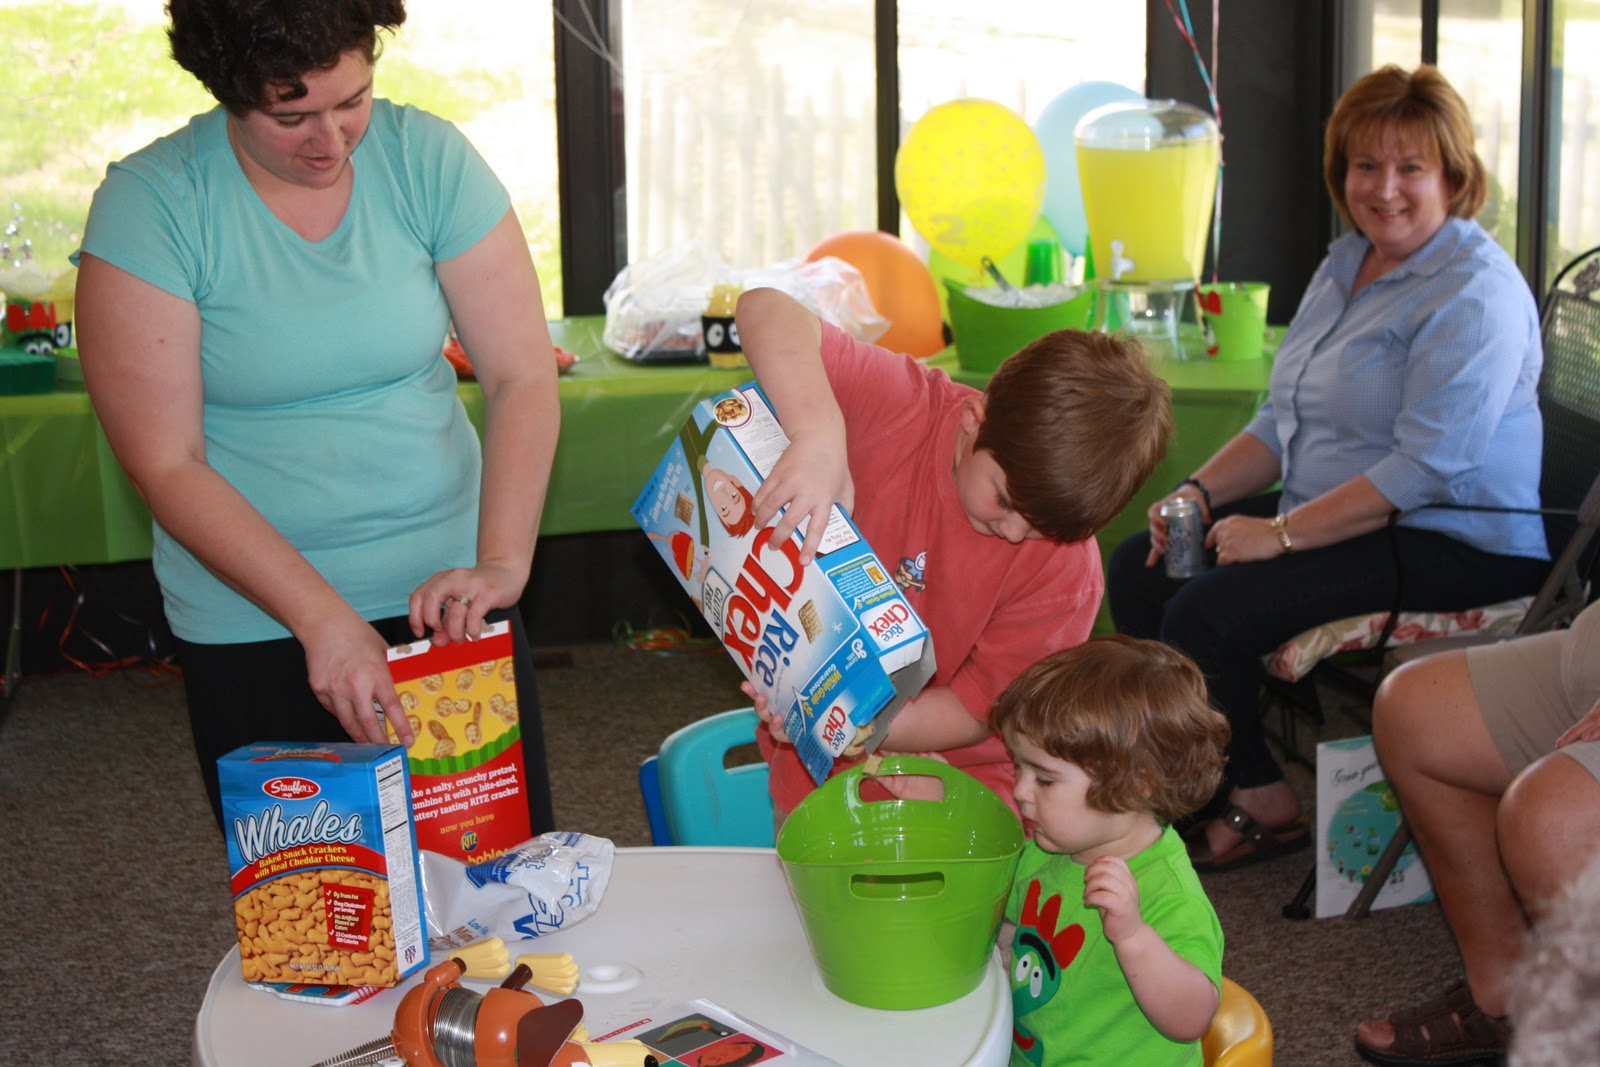
The guests arrived, and the party was under way! It all started with some "cooking" activities for the children. E loves to "cook" with mommy, so we wanted that to be a part of his special day. He and his cousin D mixed up a fruit salad and some party mix for the guests to enjoy for the party in their tummy! Sure, no actual cooking was involved here, but it didn't matter to E. He got to use a big wooden spoon to mix the treats, so it was enough to satisfy him, and Mommy didn't have to worry about anyone getting burned. It was a win-win situation for sure!


Then the party in our tummies was underway! Guests enjoyed the fruit salad, party mix, cheese cubes, carrots, and Chick-fil-a nuggets. Everyone's tummies must have really enjoyed the yummy treats because the food was practically all gone by the end of the party!

After everyone had eaten, it was time for cupcakes! E absolutely loved having us sing the birthday song to him. He also loved blowing out the candles...so much so that he insisted that they be relit so he could blow them out again! Just look at the joy on his sweet little face!


After he finished blowing out his candles, he was ready to dive into his cupcake!


After cupcakes came the presents! He enjoyed opening them, as most kids do.


Notice the paper flying in mid-air. 

Ahhhh! Buzz Lightyear! After opening this bag full of Toy Story goodies from D and Z and family, it was hard to get him to move on to the rest. He was SO excited to have his own Buzz Lightyear and Woody!

But with a lot of prodding, he finally managed to open the rest.


After opening the presents, it was time to head outside! He spent some fun time playing with all three of his cousins, D, Z and L! The four of them don't get together very often, so it is always a special time when they do. They had a great time posing for a group photo around E's new Lightning McQueen power wheels from Grammy, Papa S, and Aunt C.


They make a great team. L may be the next Danica Patrick with her cousins as her pit crew!


It was a fun ending to a super special day! Thanks so much to everyone who came to help him celebrate. Several of the guests drove an hour or even three to be here to celebrate with us. E is certainly one well loved, very blessed boy! And we are even more blessed to have him in our lives!

Happy 2nd birthday, E! Turning 2 really is AWESOME!

Tuesday, March 29, 2011

Happy Birthday to E!

My baby turned 2 a couple of weeks ago! It is so hard to believe. It seems like only yesterday we headed to the hospital early one morning to be induced. And now that precious little bundle has turned into an amazing little boy!

The morning of his birthday, he was greeted with Brobee when he came to Mommy and Daddy's room. He was very excited to see him. Then we brought him downstairs where he received his other gifts from us. He was so excited, exclaiming, "My pesants!" He tore right into them!


Then he got to choose what he wanted for breakfast. He proudly proclaimed that he wanted "Kispies" also known as Rice Krispies. He has recently decided that he really likes them.


 He even shared some with Slinky Dog, or "Sinky Dog" as he calls him.

We asked him several times before his birthday what he wanted to do on his special day. He got to choose between going to the park, the zoo, or the aquarium. Every time that we asked he responded, "Carium. See shocks and fishies!" So that's what we did. After some time to play with his new toys, we loaded up the car and headed to the aquarium.


He wore a special shirt that Mommy made him specifically for this day. Since he loves seeing the sharks at the aquarium and also enjoys watching Finding Nemo, I wanted to include those elements in his shirt.

Speaking of Finding Nemo, he had a great time watching the fish inside the Finding Nemo inspired tank.

No visit to the aquarium it complete without a visit with the penguins or "pig-ones" as he says. He loved laughing at them as they swam around and played.


After the aquarium, we had lunch at Salsarita's since the birthday boy wanted a quesadilla for lunch. We also made a stop off at Toys R Us where he got a free balloon and birthday crown and was able to spend his $3 gift card that Geoffrey Giraffe had sent him. He used it to buy a Ramone car from the movie Cars. Then we picked up a Hot 'n Ready pizza and came home for a pizza picnic.


After supper, he enjoyed the cupcake with candles that he asked for earlier in the day. He knew that people blow out candles on their birthday, and he talked about it on the way back from the aquarium. We hadn't planned on doing cake and candles that day since his party was the next day, but we couldn't deprive the birthday boy of candles on his birthday. So thanks to the Kroger bakery, we enjoyed watching him as he enjoyed having the birthday song sung to him as he blew out his two candles.


After blowing out the candles, he wasted no time getting into the cupcake. He plunged right in face first and then sat up and declared that he had icing on his nose.


He enjoyed that cupcake for a good 30 minutes. It was so fun to watch. After some outside play, he came back inside to enjoy an ice cream cone. We normally wouldn't have let him have this much sugar in one day, but it was his special day, and the ice cream came as a surprise to all of us! He had shared ice cream cones with mommy and daddy before, but he had never had his own. He enjoyed it so much!


It was the perfect end to a wonderful day. After his ice cream it was time to go to bed. He had a big day ahead of him the next day. But that will have to wait for another post...

I Feel Like Chicken Tonight...Part 2

Remember the chicken I roasted the other day? As I said, I will be turning it into different meals as the week goes on. We started the week with a yummy chicken stir fry and homemade fried rice that I made for under $5. Tonight we had chicken & rice casserole, vegetable casserole, and macaroni and cheese.

I looked at a variety of chicken and rice recipes to get an idea of what to do, then I headed into the kitchen to see what I had on hand and created my own recipe. I grabbed my ingredients and was ready to go.


In a small saucepan, I brought 1 cup of chicken broth and 1 cup of water to a boil. Then I added 1 cup of rice and let the pot return to a boil. Then I reduced the heat, covered it, and let it cook for about 15-20 minutes until all of the liquid was absorbed. Remember to stir the rice occasionally to prevent sticking.

When the rice was ready, I placed it in a mixing bowl. Then I added in the 2 cups of chicken I had set aside the other night, 1 can of cream of chicken soup, 1/4 of a cup of sour cream, and some minced onion (I added a few teaspoons. It is totally a matter of personal preference). I mixed this together and placed it in a casserole dish. Then I crushed about half of a sleeve of crackers and mixed them with a couple of tablespoons of melted butter for my topping. I covered it with foil and baked it for about 30-45 minutes at 350 degrees. I removed the foil for the last few minutes so the cracker topping would brown.


The casserole turned out great! It had wonderful flavor. The only thing I will do differently next time is add a bit more sour cream (maybe 1/2 cup instead of 1/4 cup) so it will be a bit creamier. It wasn't dry. It just wasn't as creamy as I like.

For a side dish, I made a vegetable casserole. It is one of my all time favorites. I again grabbed my ingredients and went to work.


I drained two can of mixed vegetables and placed them in a casserole dish. Then I added a heaping tablespoon of salad dressing (you can use mayo if you prefer) and mixed it with the vegetables. Then I added 1 1/2 teaspoons of minced onion, 1/2 cup of cheese, and some salt and pepper. Again I mixed this together. Then I crushed some more crackers, mixed them with some melted butter and added some more cheese on the top because you can't have too much cheese, right? Then I covered this with foil and baked it at 350 degrees until it bubbled, about 30 minutes. I removed the foil at the end of the cooking time for this as well so the topping would brown and all the cheese would melt.


I also made a box of Kraft Macaroni and Cheese for my little E. I wasn't sure if he would eat the vegetable casserole, so I wanted to make sure he got plenty to eat!

And now for the cost:

  • Chicken & Rice Casserole: $4.24
    • Chicken: $1.46
    • Rice: $0.50
    • Cream of Chicken Soup: $0.88
    • Sour cream, minced onion, crackers, chicken broth: $1.40
  • Vegetable Casserole: $2.36
    • 2 cans of mixed vegetables: $1.36
    • Salad dressing, minced onion, cheese: $1.00
  • Macaroni and Cheese: $0.67 (I picked up a package of 12 boxes for $8 at Sams last week! I usually make homemade mac and cheese, but the low price and convenience make it great to have on hand.)
That means this meal was prepared for $7.27. And we had plenty of leftovers to have another full meal! So again, this meal would easily feed a family of 4 for under $10. And it took about 25 minutes to prepare (that includes cooking the rice) and bakes in 30-45 minutes. The casseroles can be assembled ahead of time and placed in the oven just before your meal.

All of these dishes are incredibly easy to prepare and are very affordable for a family on a budget. And they taste great! And it was a complete change from the stir fry we had earlier in the week, so we don't get tired of having chicken all week! 

Stay tuned for the third and final segment of this week's chicken menu in a couple of days!

Monday, March 28, 2011

I Feel Like Chicken Tonight...

In my post about saving money at the grocery store, I mentioned that I have recently become a huge fan of cooking a large portion of meat at the beginning of the week and turning into different types of meals as the week goes on. I wanted to give you a real life example of how I make this happen, so I am sharing with you what our family is enjoying for dinner each night.

This has turned into a sort of Food Network hodgepodge of Robin Miller meets Melissa D'Arabian meets Rachel Ray in many ways. Yes, I am definitely a Food Network junkie! Robin Miller hosts a show called Quick Fix Meals with Robin Miller where she shows you how to cook ahead at the beginning of the week to save time on weeknights. Melissa D'Arabian hosts a show called Ten Dollar dinners where she shows you how to make a meal for a family of 4 on $10 or less. And of course Rachel Ray is famous for her 30 minute meals. I have watched all three of these ladies and picked up tips here and there from each of them, but I don't think I have ever seen any of them make any of the dinners I am preparing this week. Anyway, I digress...

This week's menu all started on Saturday afternoon when I roasted this whole chicken that I had picked up at Sams last week for $4 (plus tax, so let's say $4.40)! I seasoned it with some salt and pepper, covered it with foil, and placed it in the oven at 350* for about an hour and a half. I let it rest in the dish for a while after cooking.

Once it had cooled, I brought it out onto my cutting board to cut it into chunks to be used throughout the week. Since I had only used salt and pepper to season, it is still a blank canvas to be turned into what ever type of meal I desire.

You will notice the three containers behind the cutting board. These are the Rubbermaid screw top containers. Each holds 2 cups. I have noticed that a lot of recipes for casseroles, etc., call for 2 cups of meat, so I have become a huge fan of these containers as they don't take up much space in the fridge and are easy to measure my ingredients out. By the time I finished cutting up my chicken, I had 3 containers of meat! That would be enough for 3 separate recipes! You will recall that I paid around $4.40 for the chicken. Divide that by three and I have chicken for three recipes for only $1.47 each!

I wanted to start the week with Teriyaki stir fry, so I went ahead and added some Laura Lynn 30 minute Teriyaki with pineapple marinade to this container. Sure it only has to have 30 minutes, but all night has to mean it gets even better, right?

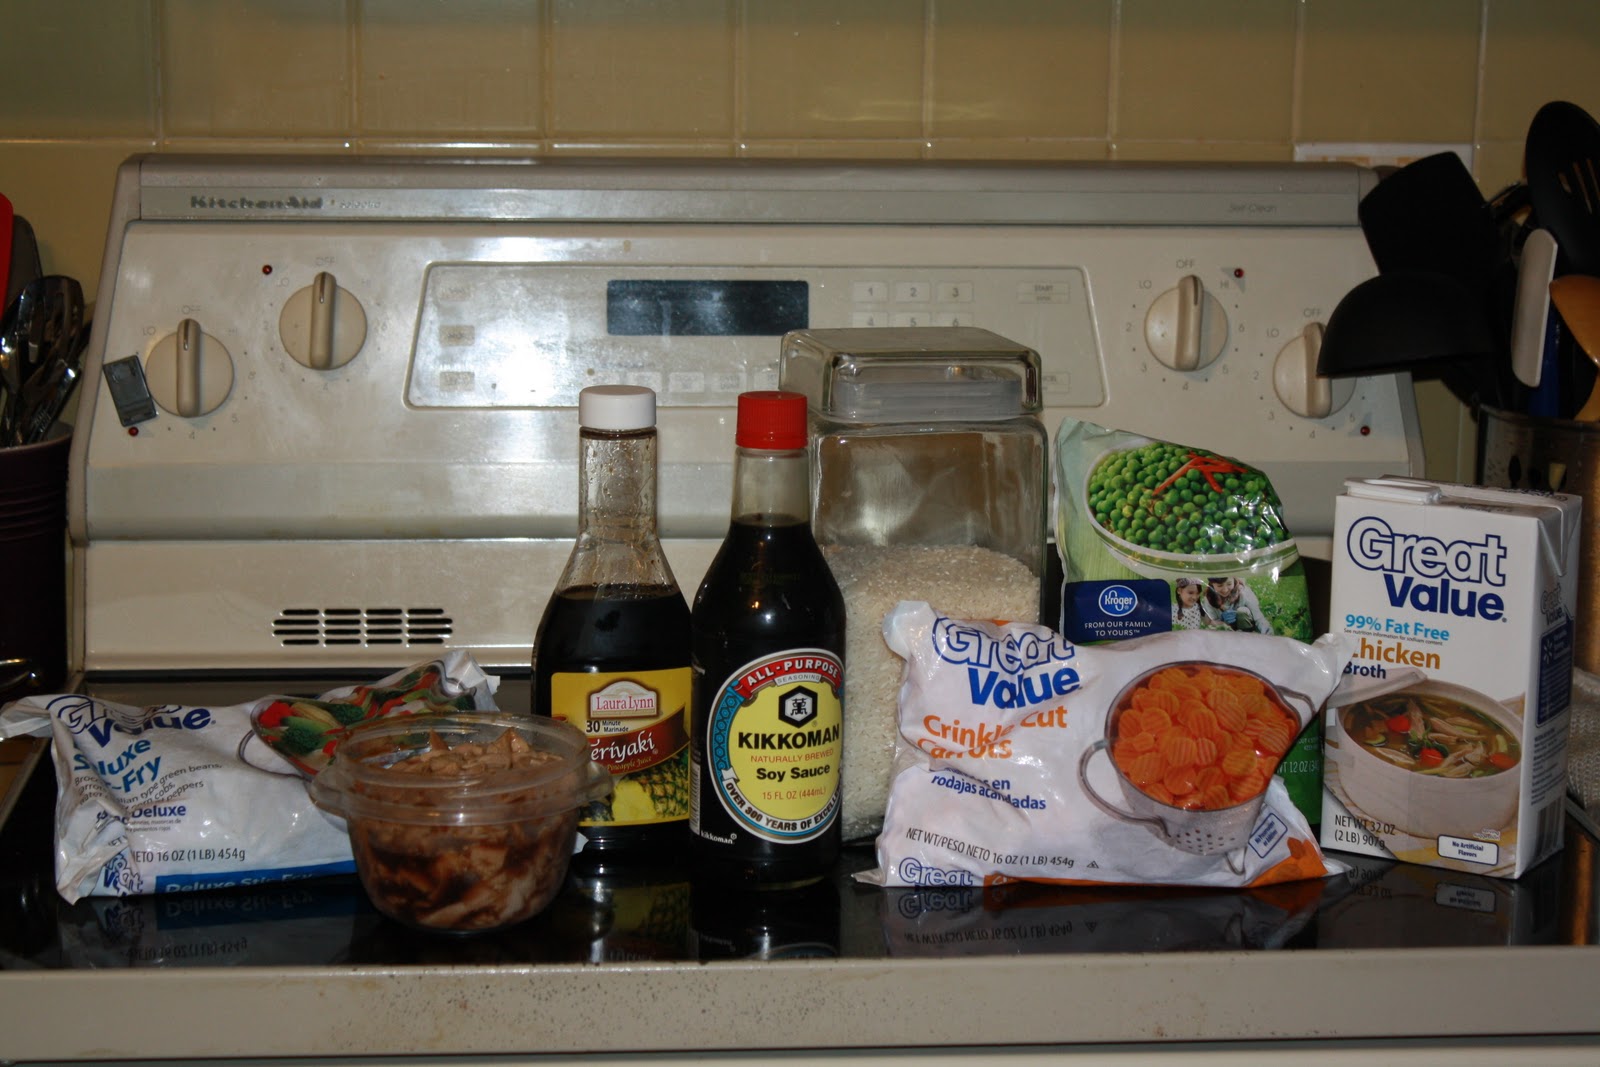
On Sunday evening when it was time to make dinner, I brought out my supplies. Teriyaki chicken and homemade fried rice was on the menu.

I started with the rice because I knew it would take the most time. In a saucepan, I combined 1 cup of chicken broth with 1 cup of water and brought that to a boil. Then I added 1 cup of long grain rice (not the instant kind). I let that return to a boil, then reduced the heat and covered it. I let it cook for just under 20 minutes, stirring it occasionally to keep it from sticking.

In the mean time, I boiled a little water in a small saucepan and added some frozen peas and carrots. I cooked them for about 4 minutes. Ideally I would have used a bag of peas and carrots already mixed, but we were out, so I had to use what was on hand. So after mine cooked, I had to chop my carrots so they were small enough to be added to my fried rice.

I will admit that I had never made friend rice before. As a matter of fact, rice is one of those foods that has always intimidated me. And when you can buy those Lipton or Knorr packets (whatever the brand name is this week) for about $1.50 each, why mess with it, right!? Well, this rice was way better than the packets, and it didn't take long at all. If you, too, have been afraid to give it a try, fear no more! It's easy!

As the time on the rice came to an end, I added some oil to two large skillets on the stove. One skillet was for the stir fry and the other was for the fried rice. I added a bag of stir fry vegetables and the chicken (which I had picked up for 98 cents) to one skillet. I let that cook while I worked on the rice. I gave it an occasional stir and added some more teriyaki for good measure.

In the other skillet, I dropped in my peas and carrots. I stirred those around and then added one egg which I had beaten. I quickly stirred it around with the veggies to scramble it. Then I added the rice as soon as it was finished. I mixed all that around, and added some soy sauce and teriyaki. It smelled delightful, looked beautiful and tasted delicious!

And here's what it looked like when I served it.

It was a hit with everyone, including my 2-year-old!


And it was ready in less than 30 minutes. Sure, it took a little preparation ahead of time, but it was well worth it! And I definitely made the meal for under $10, and it fed our family twice.


  • Chicken: $1.47
  • Bag of stir fry veggies: $0.98
  • Rice: $0.50 (I paid $3 for a huge bag of rice a while back. I have used it for many recipes. I am sure this is an overstatement of how much it cost, but you get the point)
  • Peas and Carrots: $0.25 (again, a bag costs $0.98 and you are only using a fraction of a bag)
All of that totals up to $3.20. The seasonings and egg are ingredients most folks have on hand, so I didn't include those, but even if you add $1.00 for the portions of those, not only is this meal under $10, it is under $5!! And it will easily feed a family of 4!

This is definitely a keeper in our house! I am including instructions for the rice in recipe form below. Stay tuned later this week as I share the rest of our chicken meals with you!


Homemade Fried Rice

1 c. chicken broth
1 c. water
1 c. rice
1/2 c. peas and carrots
1 egg, beaten
oil
soy sauce
30 minute teriyaki marinade, optional

Place chicken broth and water in medium saucepan and bring to a boil. Add rice and return to a boil, then reduce heat and cover. Cook for approximately 20 minutes, stirring occasionally.

While the rice cooks, bring a small amount of water to a boil in a small saucepan. Add in peas and carrots. Cook for 3-4 minutes. Remove from heat and drain.

Heat large skillet and cover bottom with oil. Add peas and carrots. Stir. Add in beaten egg, stirring around to scramble the egg with the vegetables. When rice finishes cooking, add it to the egg and vegetable mixture. Shake in some soy sauce and stir, mixing well. The amount to add depends on your taste. You can also add some teriyaki sauce or marinade as well if you desire.